{{ data.msg }}

Your browser does not support all of our website’s functionality. For an improved shopping experience, we recommend that you use the most recent versions of Google Chrome, Safari, or Firefox.

Welcome To Karoo 

The Hammerhead Karoo bike computer is about to become your ultimate ride companion. The stunning smartphone-like screen, mega memory, all-day battery life, and effortless navigation will allow you to focus on the road ahead like never before. Let’s cover the basics of your Karoo so you can hit your training goals, explore new routes, and enjoy every ride. Get ready to ride with Karoo in 10 simple steps. 

STEP 1: CREATE AN ACCOUNT OR LOG IN 

Imagen relacionada

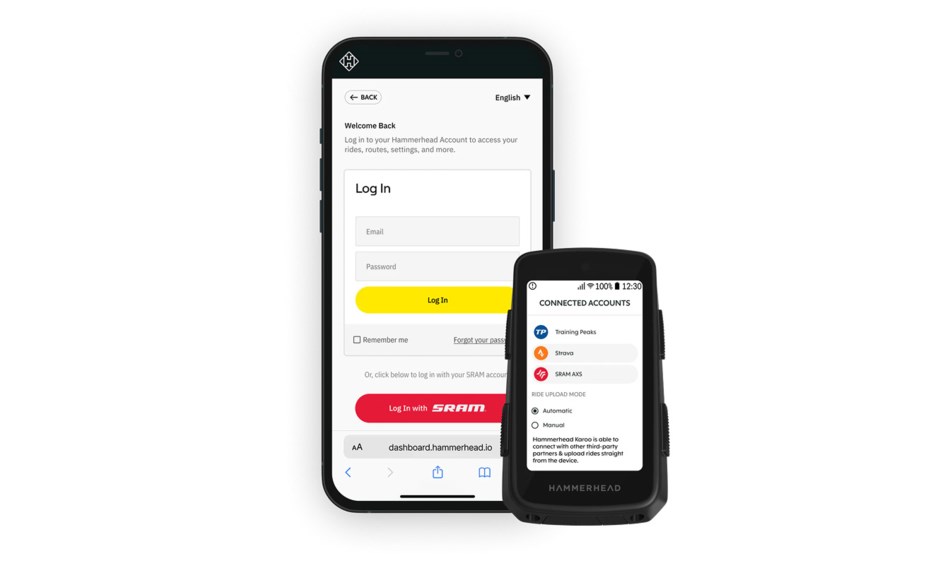
To begin using your new Karoo, you’ll need to set up a Hammerhead Dashboard account. The dashboard acts as your Karoo’s database, and creating an account lets you upload rides, send routes and workouts to your device, and much more. SRAM AXS owners can log in with an existing SRAM account for seamless integration between Karoo and AXS-equipped bikes. Logging in with SRAM ensures the AXS drivetrains and power meters in your AXS app automatically sync as sensors with your Karoo. 
GET STARTED

STEP 2: CHARGE YOUR KAROO 

Imagen relacionada

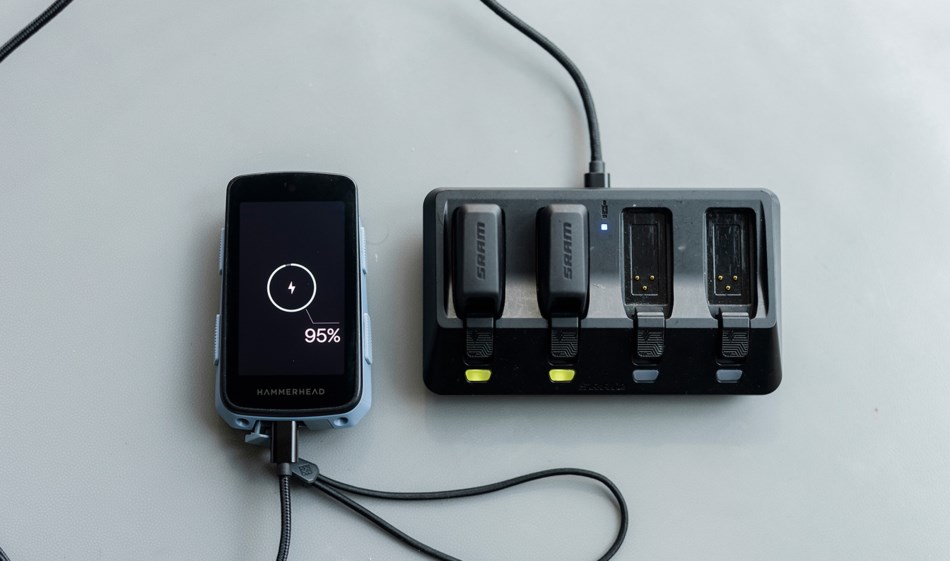
Your Karoo comes with a USB-C to USB-C charging cable, and we recommend charging it fully before your first use. A full charge will take less than 2.5 hours. Locate the charge port on the bottom of the Karoo and carefully open the cover. Plug in the charging cable and charge to 100 percent. To check the battery status while charging, press the power button next to the charge port to see the current battery percentage.  

LEARN MORE

STEP 3: LEARN ABOUT YOUR BUTTONS AND TOUCHSCREEN

Your Karoo features both a hi-res touchscreen and highly responsive buttons. In addition to the power button, you’ll find two buttons on the left and right side of the Karoo. Let’s cover each button’s various functions:

Top left button

  • Short press: Navigate left on profiles, data screens, tabs
  • Long press: Zoom out on maps and graphs
Top right button
  • Short press: Navigate right on home screen, profiles, ride app, data, drawer, tabs
  • Long press: Zoom in on maps and graphs
Bottom left button
  • Short press: Back action on menu screens
  • Long press: Go to home screen
Bottom right button
  • Short press: Start, pause, resume ride
Power button
  • Long press: Power on/off
  • Short press: Screen on/off

Always keep in mind that you can do anything with buttons that you can do on the touchscreen, so you can navigate your device in whichever way you prefer. 

STEP 4: POWER ON YOUR KAROO AND FOLLOW PROMPTS

Once your Karoo is fully charged, turn it on by pressing the power button for 2-4 seconds. Your Karoo will then walk you through initial setup, including connecting your phone and Wi-Fi network, logging into your dashboard account, and guiding you through all its features.

Once setup is complete, be sure to familiarize yourself with your Karoo’s Control Center, which gives you access to the toggles and features for notifications, system and display settings, and much more. Open the Control Center by pressing the top left and top right buttons at the same time or swiping down from the top of the screen. Close it by pressing the buttons together again or swiping up.

LEARN MORE

STEP 5: INSTALL YOUR LANYARD AND MOUNT

For secure and simple mounting, your Karoo includes a 31.8mm mount, a quarter-turn adapter, and a safety lanyard. Start by installing the lanyard, which will keep your Karoo tethered to the handlebars at all times:

Next, install the mount to your handlebars using a 3mm hex wrench and familiarize yourself with how it works. When you slide the Karoo onto the mount, you’ll hear a click to confirm it’s locked into place. To remove, firmly rotate the Karoo 15º left or right until you hear a double-click, then slide the device straight off the mount in a forward direction. 

Imagen relacionada

Installing the Mount

Imagen relacionada

Using the Mount

If you already own a quarter-turn style mount, make sure it’s compatible with Karoo and then install it using our recommended steps here. Need other mounting options? We’ve partnered with K-EDGE and Zipp to provide as many mounting solutions as possible.

LEARN MORE

STEP 6: PAIR YOUR SENSORS

Your Karoo can connect with most ANT+ and Bluetooth cycling sensors: heart rate monitors, power meters, rearview radar, smart lights, SRAM AXS components, and more. You can pair any number of Bluetooth Low Energy sensors and up to 15 ANT+ sensors simultaneously, including ANT+ radar and lights.  

If you have more than 15 ANT+ sensors, no worries. Just assign specific sensors to individual ride profiles so your Karoo connects only to the sensors needed for your current ride. 

HOW TO PAIR SENSORS  ASSIGN SENSORS TO PROFILE

Imagen relacionada

Tech Tip: If you logged into your Karoo with your SRAM account, your AXS components will connect to your Karoo automatically as sensors to record and display your gearing data and component battery status. Simply toggle on “AXS Bike Sync” in your connected accounts settings on your Karoo. 

LEARN MORE

STEP 7: CONNECT TO STRAVA AND OTHER THIRD-PARTY ACCOUNTS 

To sync rides or workouts with sites like Strava and TrainingPeaks, visit the Hammerhead Dashboard to connect your accounts. Once connected, you’ll be able to choose between automatic or manual upload modes.

LEARN MORE

STEP 8: PERSONALIZE YOUR KAROO 

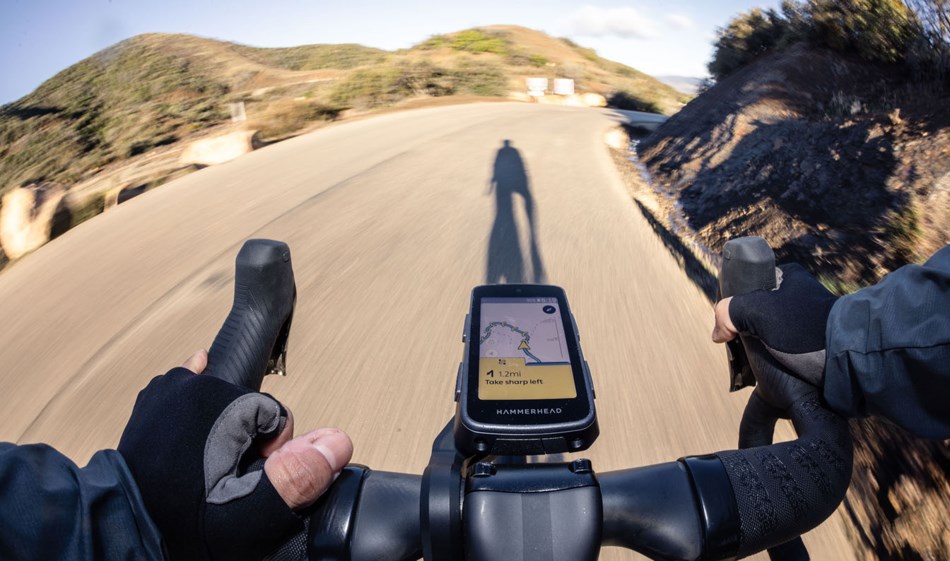
Your Karoo is completely customizable to match your ride style and preferences. Select your ideal battery settings, redesign your data fields, configure SRAM AXS Bonus Buttons, and much more. Start by creating profiles for each bike or style of riding with profile-based sensors, settings, and data fields.
MORE PERSONILIZATION TIPS

STEP 9: GO FOR YOUR FIRST RIDE AND UPLOAD

You’re ready to ride! Swipe to your preferred profile from the home screen. To start the ride, tap the yellow arrow icon or press the bottom right button. To end and save a ride, tap the pause icon or press the bottom right button. Then tap the yellow finish icon or press the bottom left button. You’ll be prompted to confirm you want to end the ride. Once you confirm, the ride will be saved and uploaded to any connected accounts.

STEP 10: KNOW YOUR RESOURCES AND PREPARE YOUR NEXT ROUTE

Need a deeper dive into Karoo? We’ve got a whole host of Hammerhead help articles that will walk you through just about anything you need. If you’re still stumped after reviewing the articles and FAQs, our support team is available to answer any additional questions.

READ HELP ARTICLES  CONTACT US

Imagen relacionada

When you’re ready to start planning your next ride with Karoo, visit our Routing and Resources Guide to learn everything from creating and syncing routes, reading and using maps, utilizing Live Tracking, and more. 

ROUTING AND RESOURCES GUIDE

LEARN MORE

PERSONALIZING YOUR KAROO

LEARN MORE

KAROO TECH TIPS

LEARN MORE