{{ data.msg }}

Your browser does not support all of our website’s functionality. For an improved shopping experience, we recommend that you use the most recent versions of Google Chrome, Safari, or Firefox.

How to keep your Zipp wheels rolling like new

You want fast, smooth, and reliable performance from your Zipp wheels, and we’re here to make sure you’re getting all that and more with our top maintenance tips. Learn everything you need to know to take proper care of your wheels, from fixing flats mid-ride to doing regular service at home.

Roadside repair | Replenishing sealant | Maintaining tubeless valves | Checking rim tape | Servicing hubs | Cleaning rims | Cleaning and maintaining Zipp AXS Wheel Sensors

Roadside repair

Tubeless systems are less prone to flats than a tubed setup thanks to the sealant taking care of most punctures. If you have enough sealant inside your tires, you may not even notice it working hard to seal any tiny cuts or nicks.


Should you experience some air loss during a ride, you can simply pull over to locate the puncture, let the sealant pool around the damaged area, and pump your tire back to your desired pressure to keep rolling. However, a significant gash can be too much for any amount of sealant to do its job. That’s when tubeless plugs, or even a spare tube, can come in handy. Let’s go over both options step-by-step:

Tech tip: When preparing a tubeless flat repair kit to carry on rides, make sure your spare tube has a long enough valve stem for your rim. You may need a valve stem extender for deeper rims. You’ll also need a valve core remover to install most extenders. Find your wheel in our Spare Parts Catalog and identify your recommended valve stem extender size under Tools & Accessories. These tiny parts can make a massive difference when you’re in a roadside bind. 

Replenishing sealant

As your wheels spin while riding, tubeless sealant coats the inner surface of each tire to provide continuous puncture protection and an airtight seal between the tire bead and the rim. Over time, it’s normal for your sealant levels to deplete, as it plugs up small holes and eventually dries out or breaks down. You’ll need to top off your sealant to ensure its effectiveness. Add sealant to your tires after a puncture occurs and check with your sealant manufacturer for additional suggested replacement intervals. We recommend refreshing your sealant at least a few times a year to be safe.

When topping off sealant in wheels with Zipp AXS Wheel Sensors, always use the syringe and needle adapter that came with your wheels. This specially designed setup allows sealant to flow directly into the tire without contacting and potentially damaging the sensor’s electronic internals. 
Tech tip: It’s especially important to check your sealant if your bike has been dormant for a while. When storing your bike, make sure your wheels are oriented with the valves at the highest point to prevent sealant from pooling, drying, and creating clogs at the valves.

Maintaining tubeless valves

Tubeless valves are a crucial piece in controlling the flow of air both in and out of your tubeless system. Whether you are losing air too quickly or you are unable to easily pump air into your tires, you’ll want to start at the valve. It could be as simple as a loose lock nut, a crushed o-ring, a bent valve, or clogged valve core. 

Zipp AXS Wheel Sensors feature specially designed valves with two extra o-rings that contact the inside of the sensor to keep sealant out and hold the device in place to measure your tire pressure. For added visibility, these o-rings are red so you can easily spot any damage when the valve stem is removed. If the o-rings are out of place or deformed, the valve can scratch the inside of the sensor’s valve stem hole and create air leaks. If you see any scratching inside the sensor, contact your local Zipp dealer for further troubleshooting.

DEALER LOCATOR

Checking rim tape

While tubeless rim tape does not have specific service intervals, the adhesive that attaches it to the rim does eventually wear out, requiring replacement. Old or damaged tape will often make itself visible by allowing sealant to leak through the spoke nipples. You may even hear air hissing around where the spokes meet the rim. If you suspect a tape issue, remove your tire and sealant to inspect the tape for damage such as tears from tire levers, or lifts from dried out adhesive.

Tech tip: If you're unable to find a leak, mix some soap and water and spray it around the spoke nipples on the rim. Any escaping air will create visible bubbles to show a leak.

VIEW THE MANUAL

Servicing hubs

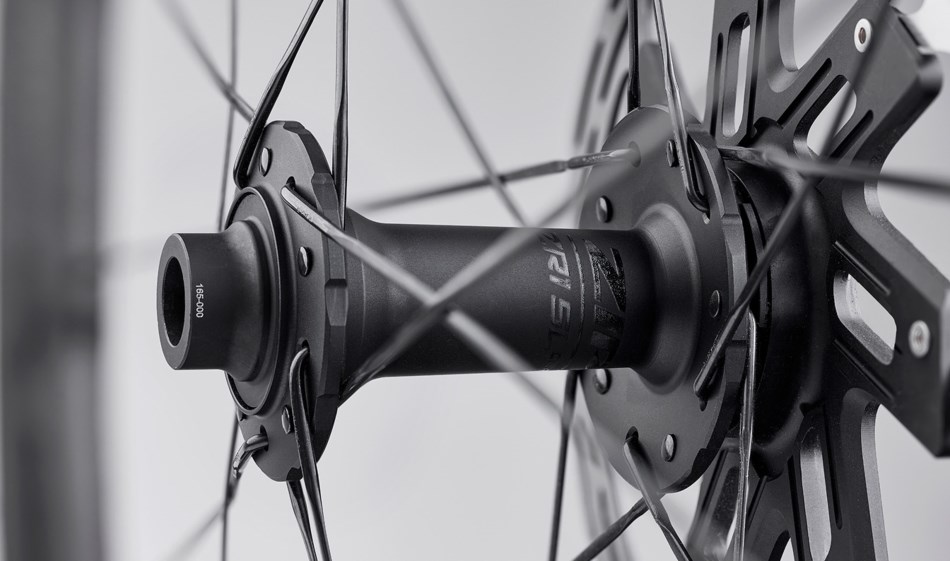
Your Zipp hubs are built to withstand all kinds of inclement weather and gritty riding conditions with long-lasting bearings and full contact seals for better durability. The lifespan of the bearings in your wheels will vary based on where and how you ride. Year-round, all-weather riders will need to maintain their hubs more regularly than those who stick to the sunshine.

Related Image

It’s a good idea to inspect your hubs every 100 ride hours to ensure they’re spinning smoothly. Any kind of grinding or vibrating can point to worn bearings. Should you start to hear knocking, clicking, or popping noises while cornering or putting down power, it may be time for hub service as well. Thankfully, all Zipp hub bearings and freehubs are available as replaceable parts. Complete part numbers for located in our Spare Parts Catalog for ordering through an authorized Zipp dealer.

Cleaning rims

Only use mild soap and water to clean your rims. Keep in mind that chemical cleaners, like Simple Green, can degrade your wheel graphics and pressurized water can damage your wheel bearings. Gentle cleaning with dish soap and a garden hose is more than enough.

Once your wheels are clean, be sure to give your brake rotors some love as well. Spray isopropyl alcohol onto a microfiber cloth and wipe the entirety of the rotor’s braking track. 

Tech tip: Dealing with dried sealant on your wheels or frame? Tubeless sealant is water soluble, so simply wipe it away with a damp rag. The longer the sealant sits, the harder you will have to scrub. Remember, if you see lots of sealant sprayed on parts of your bike, you should consider topping off the sealant levels in your tires.

Cleaning Zipp AXS Wheel Sensors

Receive accurate tire pressure readings even when your riding gets gritty by keeping your Zipp AXS Wheel Sensor assemblies clean with a handful of maintenance tips:

  1. Remove the sensor from the rim and use a damp cloth to wipe off any dirt and debris.
  2. Open the battery latch with a flathead screwdriver to remove the battery tray and gently clean the o-ring and exterior portion of the tray. Avoid the area where the battery sits, as cleaning here can compromise sensor performance.
  3. Inspect the battery tray’s o-ring. If you find any tears or cracks, replace the o-ring.
  4. If the o-ring is dry, apply a thin layer of SRAM Butter or other o-ring grease. Ensure the o-ring is fully seated when reinstalled.
  5. Clean the valve stem hole in the sensor with a Q-Tip and isopropyl alcohol, being extremely careful not scratch the inside. Scratches or gouges can cause air leaks.

For more Zipp AXS Wheel Sensor service information, visit the manual. 

Learn more

Tubeless and tire pressure tips

LEARN MORE

How to calculate tire pressure

LEARN MORE