{{ data.msg }}

Your browser does not support all of our website’s functionality. For an improved shopping experience, we recommend that you use the most recent versions of Google Chrome, Safari, or Firefox.

WELCOME TO ROCKSHOX FLIGHT ATTENDANT

Flight Attendant is an automatic suspension system that adjusts your suspension to Open, Pedal, or Lock based on real-time data from both you and the trail. With Flight Attendant, your suspension is always in the right position right when you need it.

Whether it’s new bike day or you’ve installed Flight Attendant on an existing bike, use this Welcome Guide to walk you through:

  1. Pairing your components
  2. Adding your bike in the AXS app
  3. Dialing in your suspension
  4. Calibrating your system
  5. Understanding Flight Attendant’s communication style


Rider preparing to ride their RockShox Flight Attendant equipped bike
To help you figure out where to start, let's identify whether your system is set up or not. Shake it wake it and spin the cranks backwards, then follow the prompts below:

LET’S FLY

STEP 1: PAIRING

Pairing introduces your AXS-enabled components to each other with a wireless handshake, so they form a secure and seamless group.

TECH TIP:  Pairing a complete AXS system takes just seconds. Always start the pairing session with the fork’s Control Module, as it designates the fork as the system’s primary component. If you're using an AXS drivetrain or Reverb AXS, you’ll want to connect everything—Flight Attendant fork, rear shock, power meter, derailleur, controllers, and seatpost—into a single system.

Select your power meter style below to see pairing instructions for your system.

Which power meter do you have?

Spindle-based power meters are integrated into the DUB spindle of your crank arm. For best results, be sure to Zero your power meter before each ride. Learn more about Zeroing.

Remove the sled from the crankset to reveal the AXS button on the sled.


Tech Tip: Leave the sled out until you’ve confirmed that all components paired successfully.

When sliding the sled back in, align the slot in the sled with the slot in the spindle, then rotate the cap until the two circles are aligned and click into place.

Spider-based power meters attach to AXS cranks using a simple 8-bolt interface. Remove the red battery insulator from under the coin cell battery to activate the power meter. Once activated, you’ll add the power meter to your bike profile in the app as a “Pedal Sensor” after all other components are paired and added in the app.

E-MTBs use their own pedaling sensor and are added to the system in the AXS app as a “Pedal Sensor” after all other components are paired and added in the app.

STEP 2: SET UP THE AXS APP

The SRAM AXS app communicates with the AXS system on your bike, allowing you to manage your bike profiles, configure controls, customize Flight Attendant settings, and update firmware. Make sure you’re using the latest version of all your AXS components and the AXS app itself to access important features.

DOWNLOAD FOR IOS  DOWNLOAD FOR ANDROID

Log in to the SRAM AXS app and create a new bike profile. If you're adding Flight Attendant to your current bike, delete the current bike profile and create a new one. Add your fork’s Control Module to your bike profile, and all paired components will appear there.

TECH TIP: If you have a spider-based power meter or an E-MTB, make sure it's been manually added to the Flight Attendant system as a Pedal Sensor in the AXS app.

SETUP CHECKPOINT

Make sure all your AXS components are paired by checking that they show up under your bike profile in the app, or by using your controllers to actuate the drivetrain, seatpost, and Control Module. If any component is missing, repeat the pairing process.

STEP 3: SUSPENSION SETUP

To properly calibrate Flight Attendant in the next step, your fork and rear shock (if applicable) must be set to the correct air pressure and Rebound speed.

TECH TIP: When adjusting the air spring, make sure the system is set to the Open position first.

Related Image

SETTING AIR PRESSURE


Air springs use adjustable air pressure to absorb bumps and impacts from the trail to give you a smooth, customizable ride. Air pressure settings are specific to the rider and style, but we like to aim for that soft-but-still-supportive feel that can still achieve full travel when needed (hello, drops). 

Check out the air chart on your fork’s left-side lower leg or, better yet, check out the TrailHead app for your recommended starting air pressure and Rebound settings. 

Related Image

SETTING REBOUND


Rebound affects how quickly the fork returns to full travel after compression.

If the fork rebounds too quickly, causing a pogo effect that can decrease wheel control or contact with the ground, add 1-2 clicks of Rebound damping at a time by rotating the Rebound Knob clockwise (indicated by the turtle) to slow it down.

If the fork rebounds too slowly, causing the fork to feel packed down (like the fork has less and less travel with each consecutive hit), remove 1-2 clicks of Rebound damping at a time by rotating the Rebound Knob counter-clockwise (indicated by jackalope) to speed it up.  

Tech Tip: When setting Rebound, the number suggested in TrailHead is the number of clicks from when the Rebound Knob is set to full closed or toward the turtle icon.

STEP 4: CALIBRATION

With your air pressure properly set, it’s time for Calibration—which only needs to be completed before the first ride, after an air pressure adjustment, or if a Flight Attendant component is replaced. Calibration helps Flight Attendant determine where the components exist in space by performing both vertical and tilt calibrations.

FIRST UP, VERTICAL CALIBRATION


With the bike on a level surface, lower the seatpost and sit on your bike so the suspension is in the sag position, then follow the clip.

NEXT IS TILT CALIBRATION


The Open LED will pulse white slowly, indicating that the system is ready for Tilt Calibration. Unweight the bike and stand over the top tube, then follow the clip.
TECH TIP: Red LEDs indicate the bike is tilted too far in the direction of the red LEDs.

SETUP CHECKPOINT

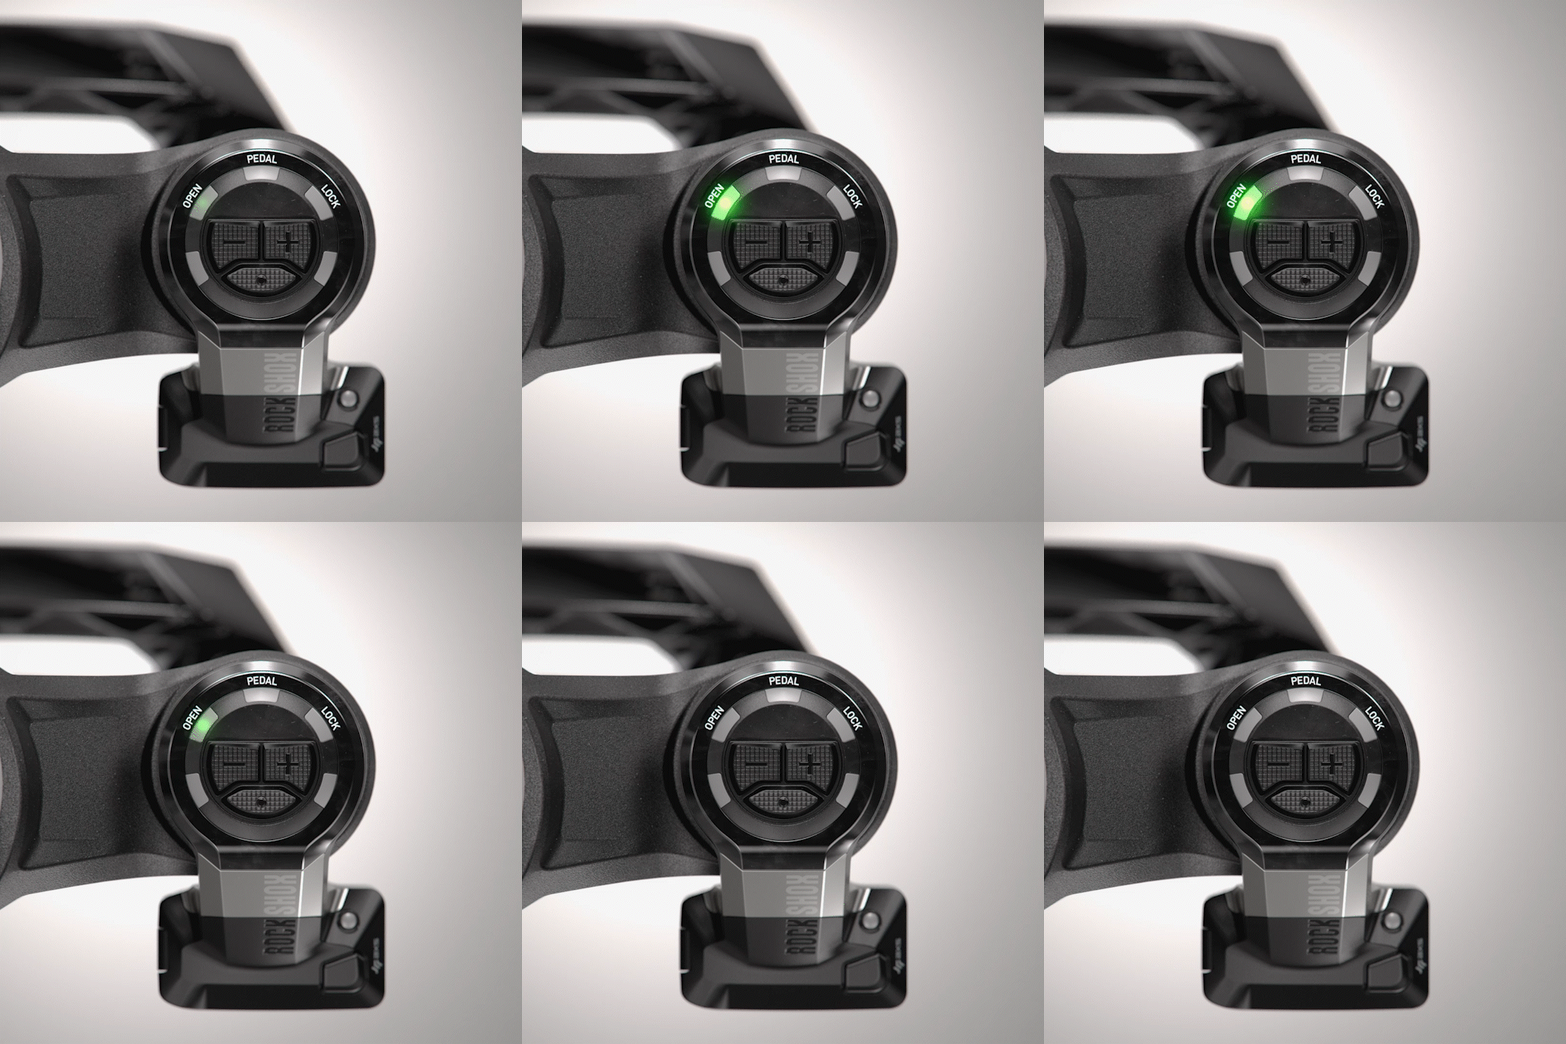
Once correctly calibrated, Flight Attendant will enter Auto Mode, indicated by the Open LED pulsing green slowly.
Not in Auto Mode? Check out the full Calibration Video, or head to Troubleshooting.

STEP 5: LEARN HOW FLIGHT ATTENDANT COMMUNICATES

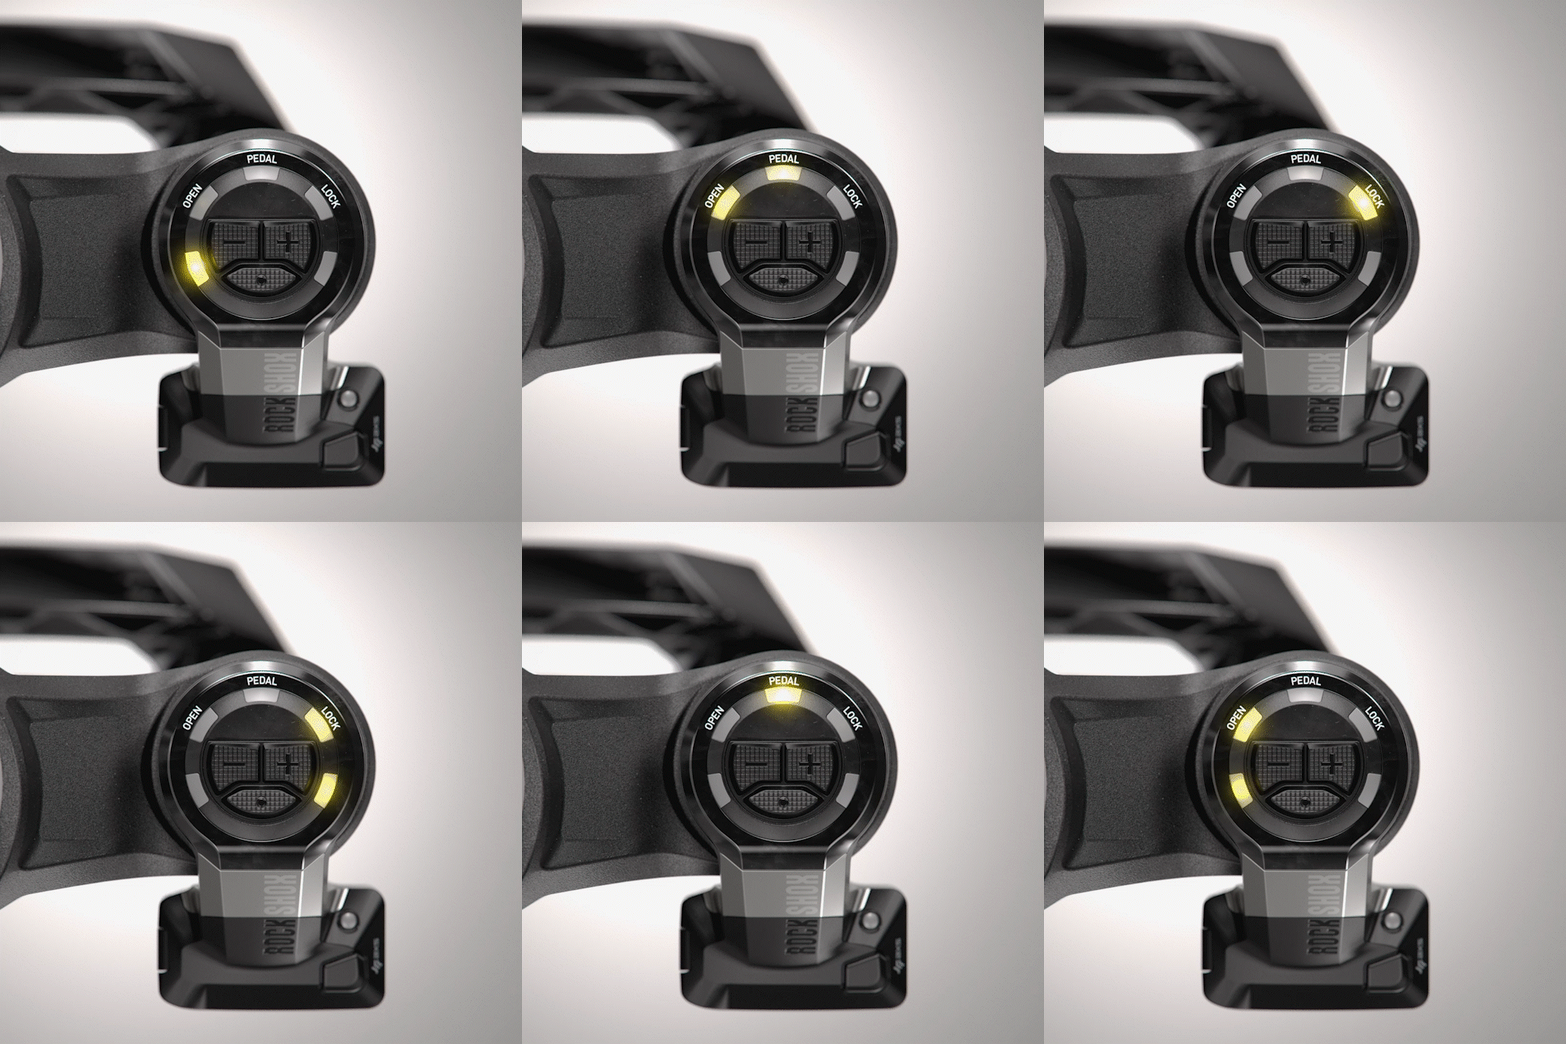
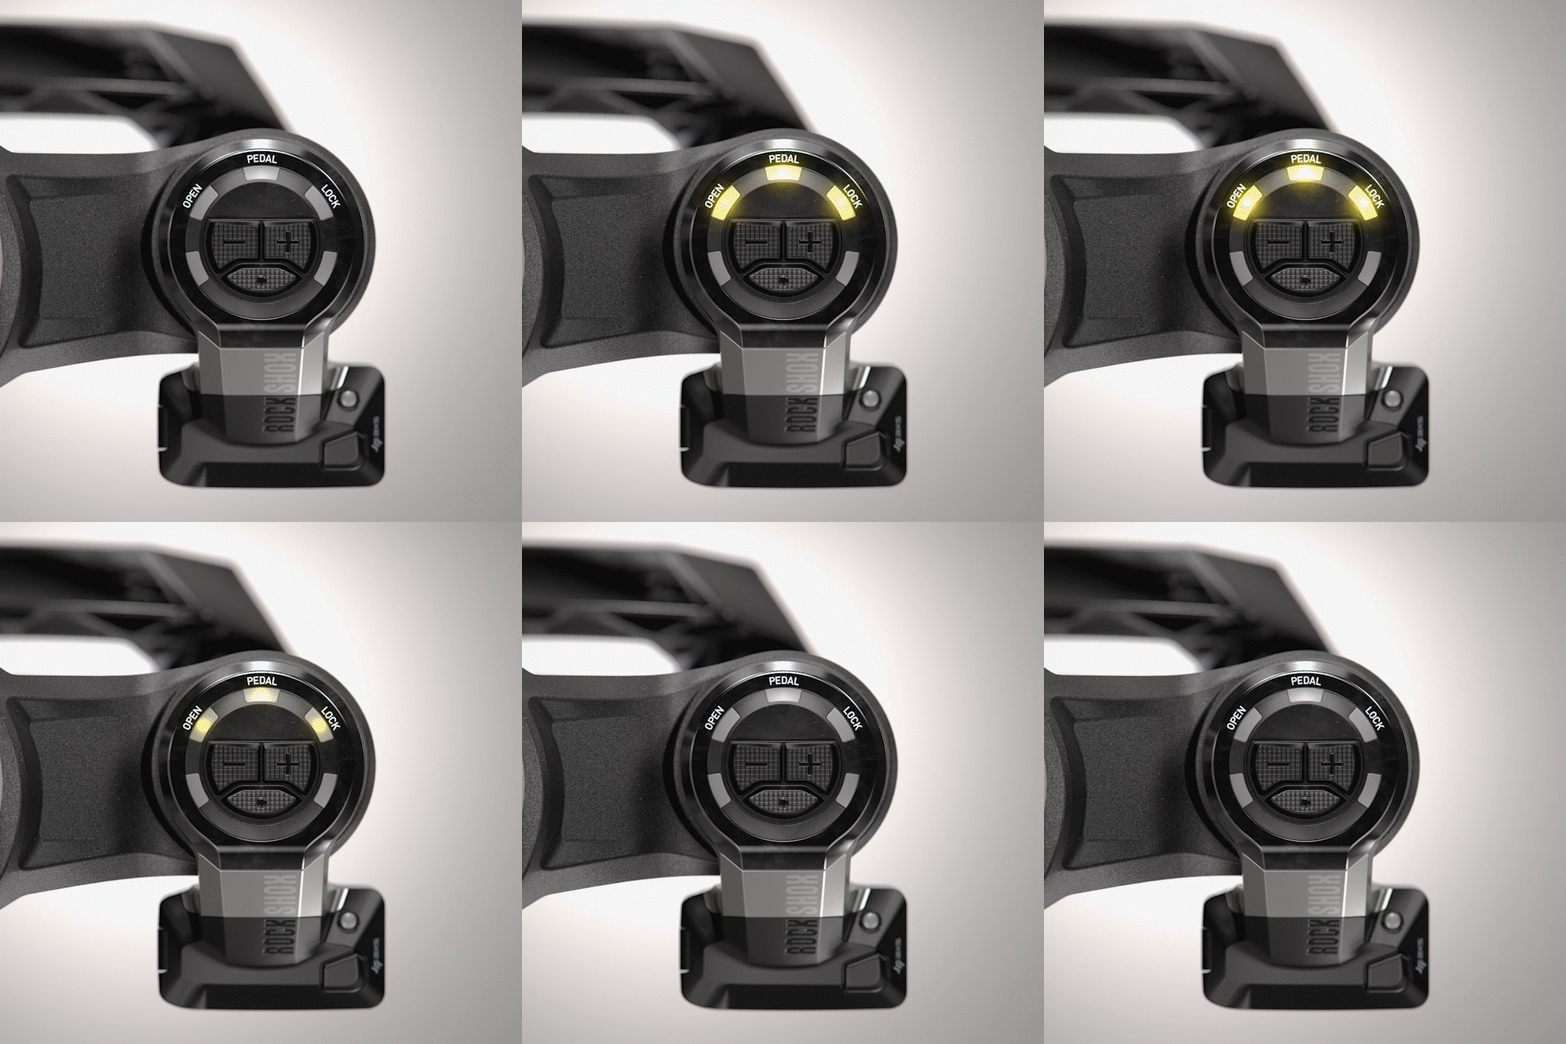
Your bike is ready to ride! But before you head out, let's take a look at how Flight Attendant communicates. The fork's Control Module LEDs will slowly pulse different colors to indicate the Mode—Auto Mode, Manual Mode, Override Mode—as well as the suspension position: Open, Pedal, or Lock.

When you're ready to learn more, head over to our LED Guide to dive into all the ways Flight Attendant communicates with you.

LEARN MORE: LED GUIDE 

SETUP CHECKPOINT

The Open LED should be illuminated green at this point. If your Flight Attendant Control Module does not look like this, check out our troubleshooting guide to identify what Flight Attendant needs to get rolling.  

TROUBLESHOOTING GUIDE

Rider on Rockshox Flight Attendant

LEARN MORE

ADAPTIVE RIDE DYNAMICS

Adaptive Ride Dynamics enables Flight Attendant’s algorithm to continuously personalize your suspension based on how you ride. It analyzes rider effort data from your last eight rides to determine your current Effort Zone—Low, Medium, High, or Sprint—displayed on the two lower LEDs on the fork’s Control Module. It takes Flight Attendant at least one 45-minute ride to start learning your Effort Zones, so the two lower LEDs will not illuminate on your first ride. To help Adaptive Ride Dynamics begin learning your Effort Zones, go for a full range of efforts on your first ride, from easy spins to all-out sprints.

MAKE FLIGHT ATTENDANT YOURS

LEARN MORE

LED GUIDE

LEARN MORE